
Robotics Hub
Your go-to resource for Arduino tutorials, IoT project walkthroughs, sensor guides, and embedded systems knowledge. Every post includes component lists, wiring diagrams, and complete source code.
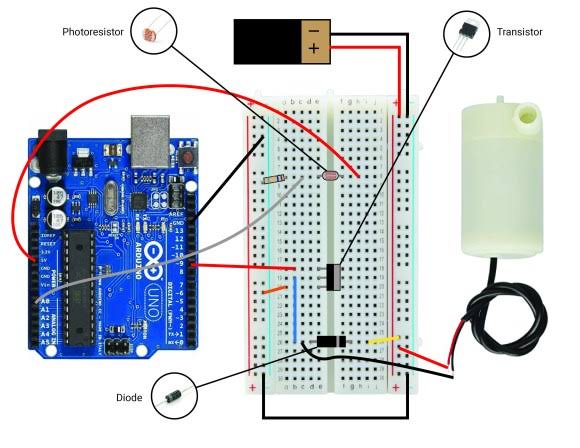
Build an Automatic Water Dispenser with Arduino and an IR Sensor
Build an automatic water dispenser using Arduino, an IR sensor, and a mini water pump. Detect hands, control water flow, and stop pumping automatically when hands are removed.
Build an Automatic Water Dispenser with Arduino and an IR Sensor
Build an automatic water dispenser using Arduino, an IR sensor, and a mini water pump. Detect hands, control water flow, and stop pumping automatically when hands are removed.
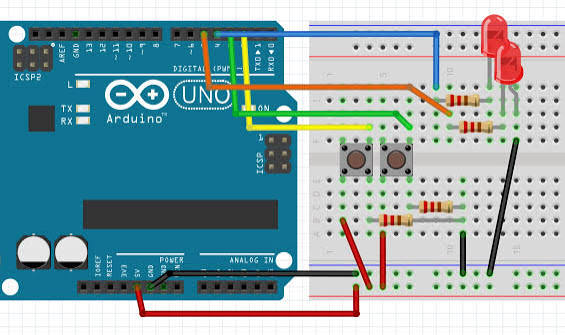
Run Multiple Tasks Using millis()
The millis() function returns the number of milliseconds since the Arduino started running its program. Instead of pausing for a fixed time, the sketch checks how much time has passed since the blinking LED last changed state.
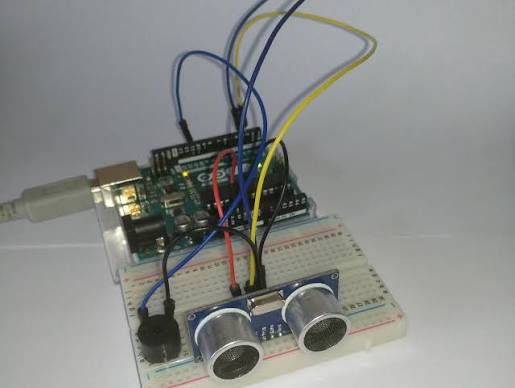
Build a Parking Distance Indicator
The Arduino measures the distance to an object and selects a coloured indicator. As the object gets closer, the indication changes from green to yellow and then red. A buzzer adds an audible warning.
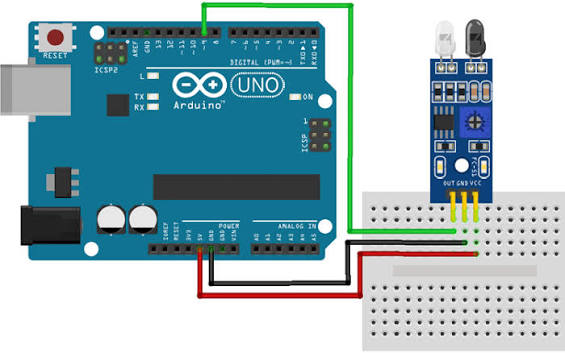
Detect Objects with an Infrared Sensor
The sensor emits infrared light and checks for light reflected by nearby objects. When it detects sufficient reflection, the Arduino turns on an LED and displays a message in the Serial Monitor.This project introduces digital sensor inputs and adjustable detection sensitivity. Unlike the ultrasonic project, this circuit reports whether an object is detected rather than measuring its distance in centimetres.
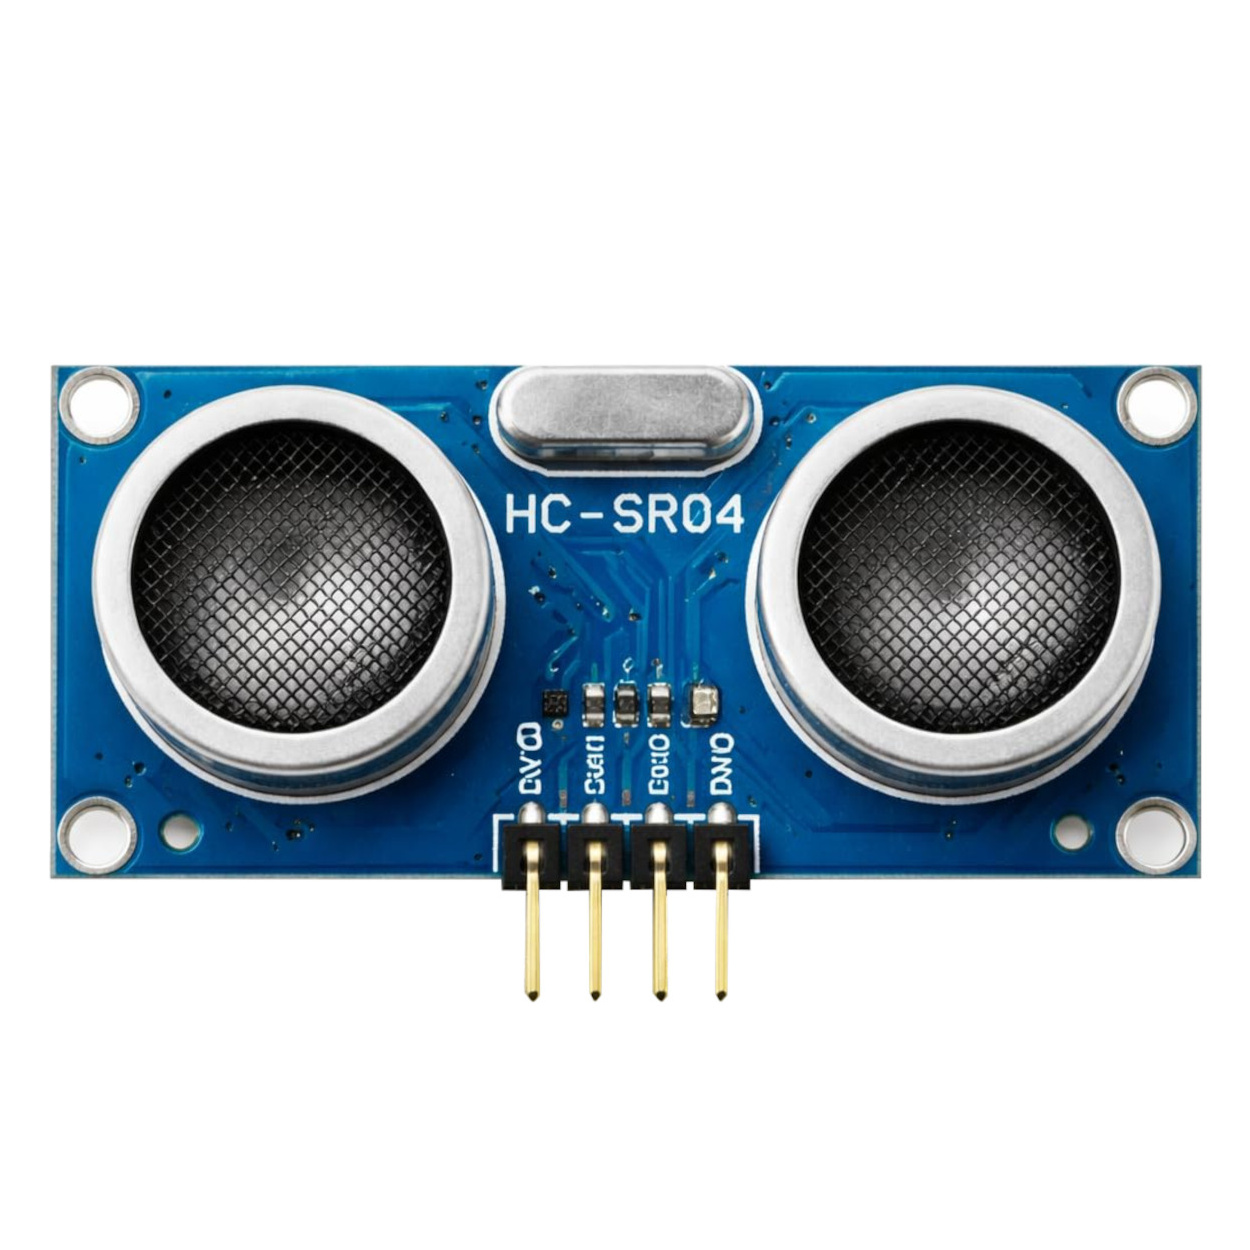
Measure Distance with an Ultrasonic Sensor
The HC-SR04 sensor sends out a short burst of sound and detects its reflection. The Arduino uses the time taken for the echo to return to calculate distance, then displays the result in the Serial Monitor.This project introduces distance sensing, which is useful in parking indicators, obstacle-detection systems, and simple robots
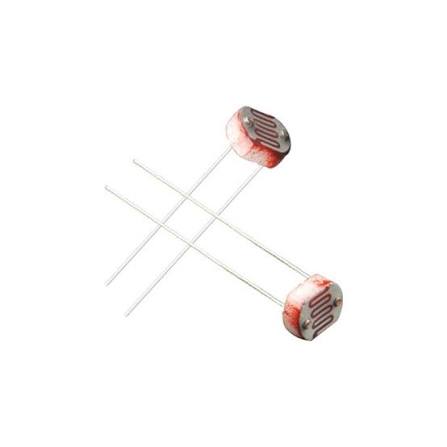
Build an Automatic Night Light with an LDR
>A light-dependent resistor, commonly called an LDR, changes its resistance according to the light falling on it. The Arduino reads this change and decides whether the LED should be on or off.</p> <p>This project introduces automatic control using a sensor
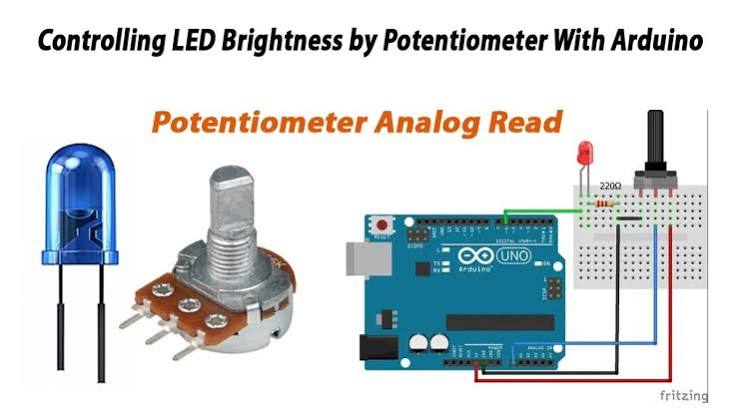
Control LED Brightness with a Potentiometer
This project introduces analog inputs and pulse-width modulation, commonly called PWM. These concepts are useful for adjustable lighting, control panels, and other interactive projects.
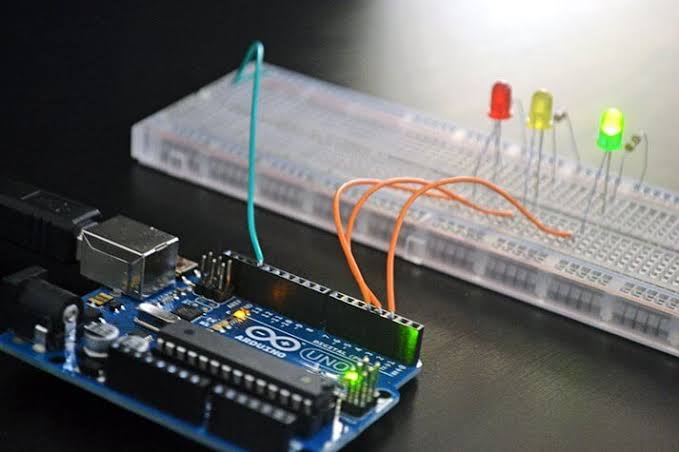
Build a Mini Traffic Light with Arduino
In the previous project, you controlled an LED with a push button. This project introduces multiple outputs by using red, yellow, and green LEDs to build a miniature traffic light
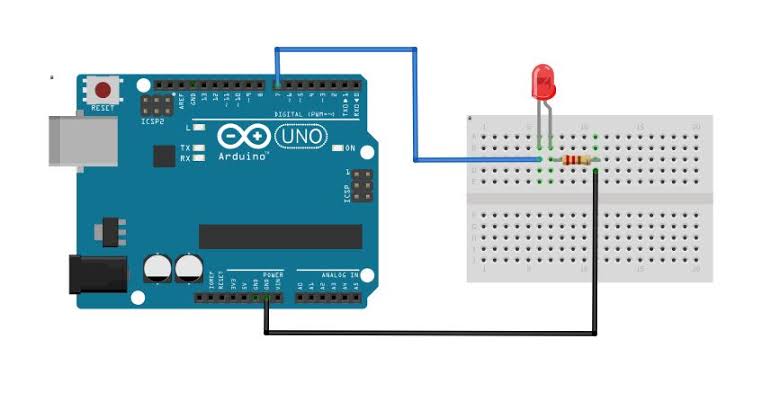
Control an LED with a Push Button Using Arduino
You will connect a push button and an LED to an Arduino Uno. When you hold the button down, the LED turns on. When you release it, the LED turns off. This introduces digital inputs: signals that let the Arduino respond to something happening outside its program.
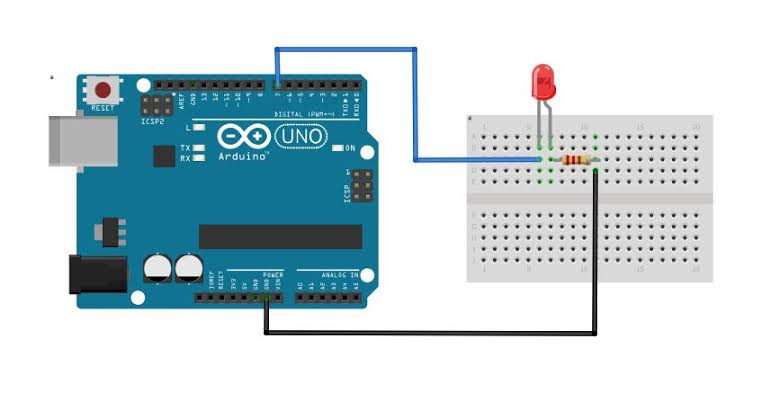
Blink an LED with Arduino
A blinking LED may look simple, but it teaches the complete workflow behind an Arduino project: write instructions, transfer them to a board, connect a circuit, observe the result, and change one thing to see what happens
Browse by Category
Why Learn Robotics?
Critical Thinking
Robotics challenges you to solve real-world problems by combining logic, engineering, and creativity. Every project teaches you to think systematically.
Career Opportunities
IoT, embedded systems, and automation are among the fastest-growing fields in technology. Starting with Arduino gives you a foundation for these careers.
Build Real Things
Unlike purely software projects, robotics lets you build physical devices that interact with the real world — from weather stations to security systems.
Getting Started with Arduino
Arduino is the perfect entry point into the world of electronics and programming. With an Arduino board, a few basic components, and our step-by-step guides, you can build your first project in under an hour.
We stock all the hardware you need — from starter kits and individual sensors to specialty modules — and every product page links directly to the tutorials that use it.
Pick a Starter Kit
Browse our shop for Arduino Uno, Mega, or ESP32 starter kits with sensors, LEDs, and breadboards included.
Follow a Beginner Guide
Start with our beginner-level posts — each includes wiring diagrams, code, and a list of components needed.
Build & Experiment
Once you complete your first project, keep going! Combine sensors, add displays, and connect to the internet with ESP32.
Arduino Uno
Best for beginners
ESP32
WiFi & Bluetooth
Sensors
Temperature, motion, light
Displays
LCD, OLED, TFT
Join the Mailing List
Get notified about new projects, technical guides, and community updates from the Robotics Hub.